Home Theater

Thursday, September 20, 2007

Doubled ventilation

Here are some shots of how I added a second bathroom fan to my forced ventilation. I added a y-joint to the upright and have a second fan configured like the first. I'm not sure why the ventilation was going out before, because it hasn't happened since I did this project.


Labels:

Saturday, September 08, 2007

Summertime Heat Wave

The forced ventilation fan isn't working well enough. Let me rephrase- when it works, it works well enough. I think the fan shuts off for some reason- or maybe it is the current switch. In any case, at some point, hot air is no longer being evacuated and then the projector shuts off.

I'm going to do two things- the first is to double-up on the fans to introduce some reliability. $11 fans are amazingly reliable- but two will be better. I've purchased a second fan which I'll put on a Y-bracket so that potentially twice the air will flow. I think I need to get a little creative to make sure one fan doesn't starve the other, perhaps by using the built-in flapper valves.

The second is I want to redesign the hush box. Right now the only intakes are three holes in the bottom of the box. These are hard to filter and probably don't flow enough air into the box. Indeed, I've been running the box with the side open just for that reason. The redesign I want to do is to swiss-cheese and channel the bottom board. I'm thinking slits that run perpendicular to each other on the top and bottom. Kind of like waffle fries (hmm, all this talk of food must be Freud telling me it is time to eat). Yes, waffle fries. Then, those slits will open up to the back of the box where I'll have an easier-to-replace filter- hopefully a standard size. This serves a couple of purposes- ease of replacement, not having projector body directly on filter material, and should direct the intake noise to the back of the room instead of below.

Labels:

Friday, September 07, 2007

Husher Box

The hushbox needed a makeover. Besides the duct tape holding on the front piece of glass, it wasnt' getting enough air. I had designed the box to be semi-passive. Vent holes in the bottom combined with a smokestack on top meant that heat should go up. It did, but not enough, and when there's a hot attic, even less. So I added a vent fan. That worked okay, but it would still let the projector overheat. I then just pulled the side off the box. That was best, but still occasionally it would over heat- I think becaues the fan would sometimes cut off.

So, a redesign of the box was in order. First of all, instead of holes being in the bottom, I wanted them in the back. I put a big filter in the back and have vent holes there, as well as a bunch of small holes in the bottom of the box. These meet up with routed tracks which also go to the filter at the back of the box. Ideally, when there's a vacuum up top, it'll bring cold filtered air to both the back and underneath the box. The only wrench is that one of the kids stepped on the taken-off side panel, so I need to refabricate it. Coming soon. In the meantime, the new box looks great.

Labels:

Sunday, October 08, 2006

Forced ventilation for the hushbox

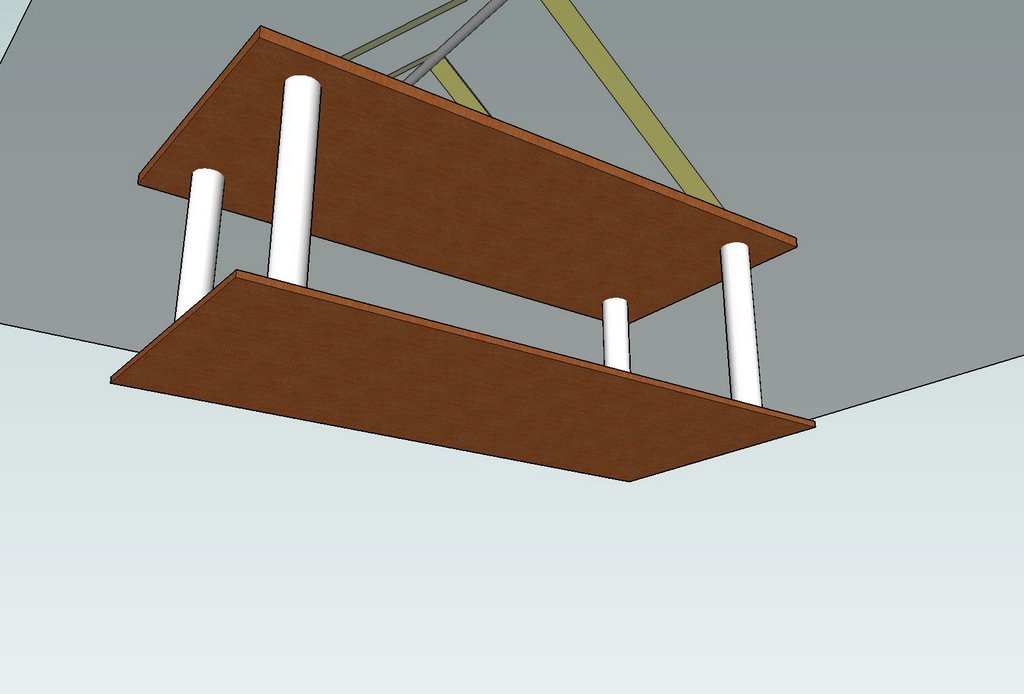
After I buttoned up the hushbox, it became apparent (the projector shutting itself off) that my idea of passive ventilation wasn't going to work.

I asked my friends (I'm lucky to have so many who are technically proficient) about different ideas. Ideas were a mainframe fan, PC fans, CPU fans... but one suggestion really stood out. How about a bathroom ventilation fan? Perfect- because I didn't want the complexity of running 12V wires up to the ceiling to control it.


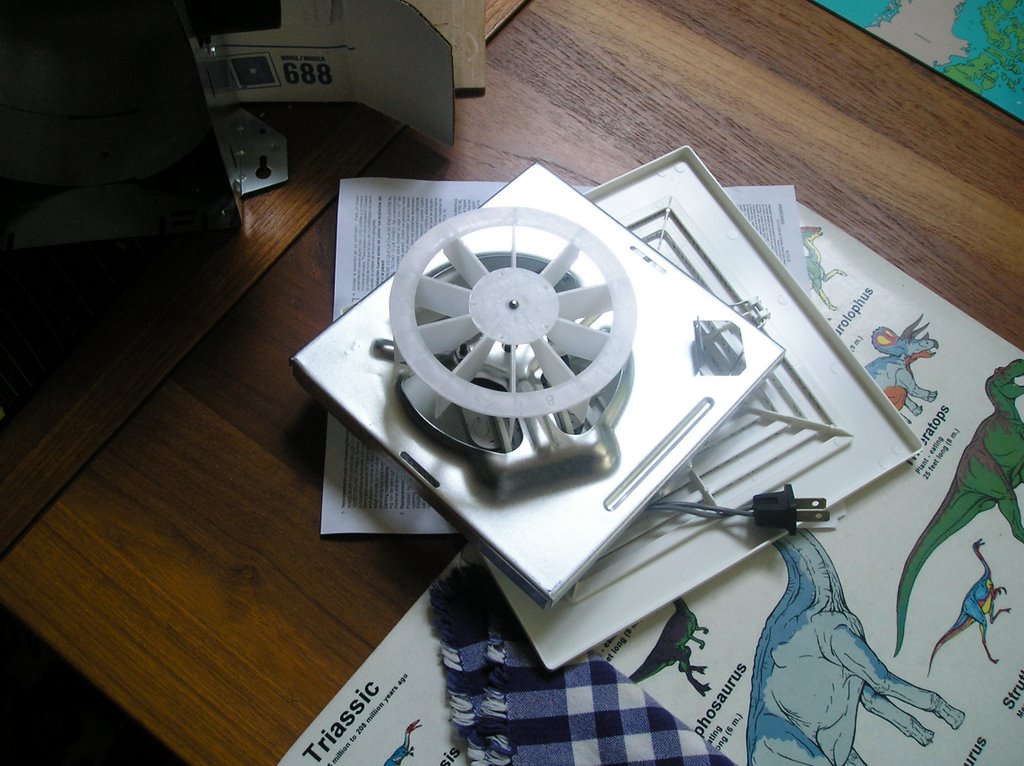
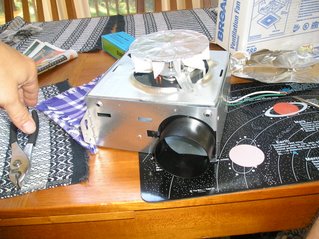
Even better! I found a ventilation fan that had a 3" outlet... which fit about perfectly into a plumbing fitting. The only issue... ventilation fans pull into their ceiling box and send the exhaust out the 3" outlet. Hmmm. That's the opposite that I needed. I considered rewiring the motor to spin backwards.. but that won't work, because the fan type is a centrifigal design. It has open vanes which accellerate air outwards. This slides around the edge of the box before finally going out the side. Darn, it wasn't going to work at all.

But wait... if I put the fan outside the box, it would pull from inside the box. But.. those open vanes would pull far more air from the ambient air than from in the box. How about some hot glue and aluminum foil?! Yes! I was really lucky that the fan I chose allowed me to flip the motor assembly upside down. Oh- and did I mention it was $12- the cheapest one they had at the local Lowes?


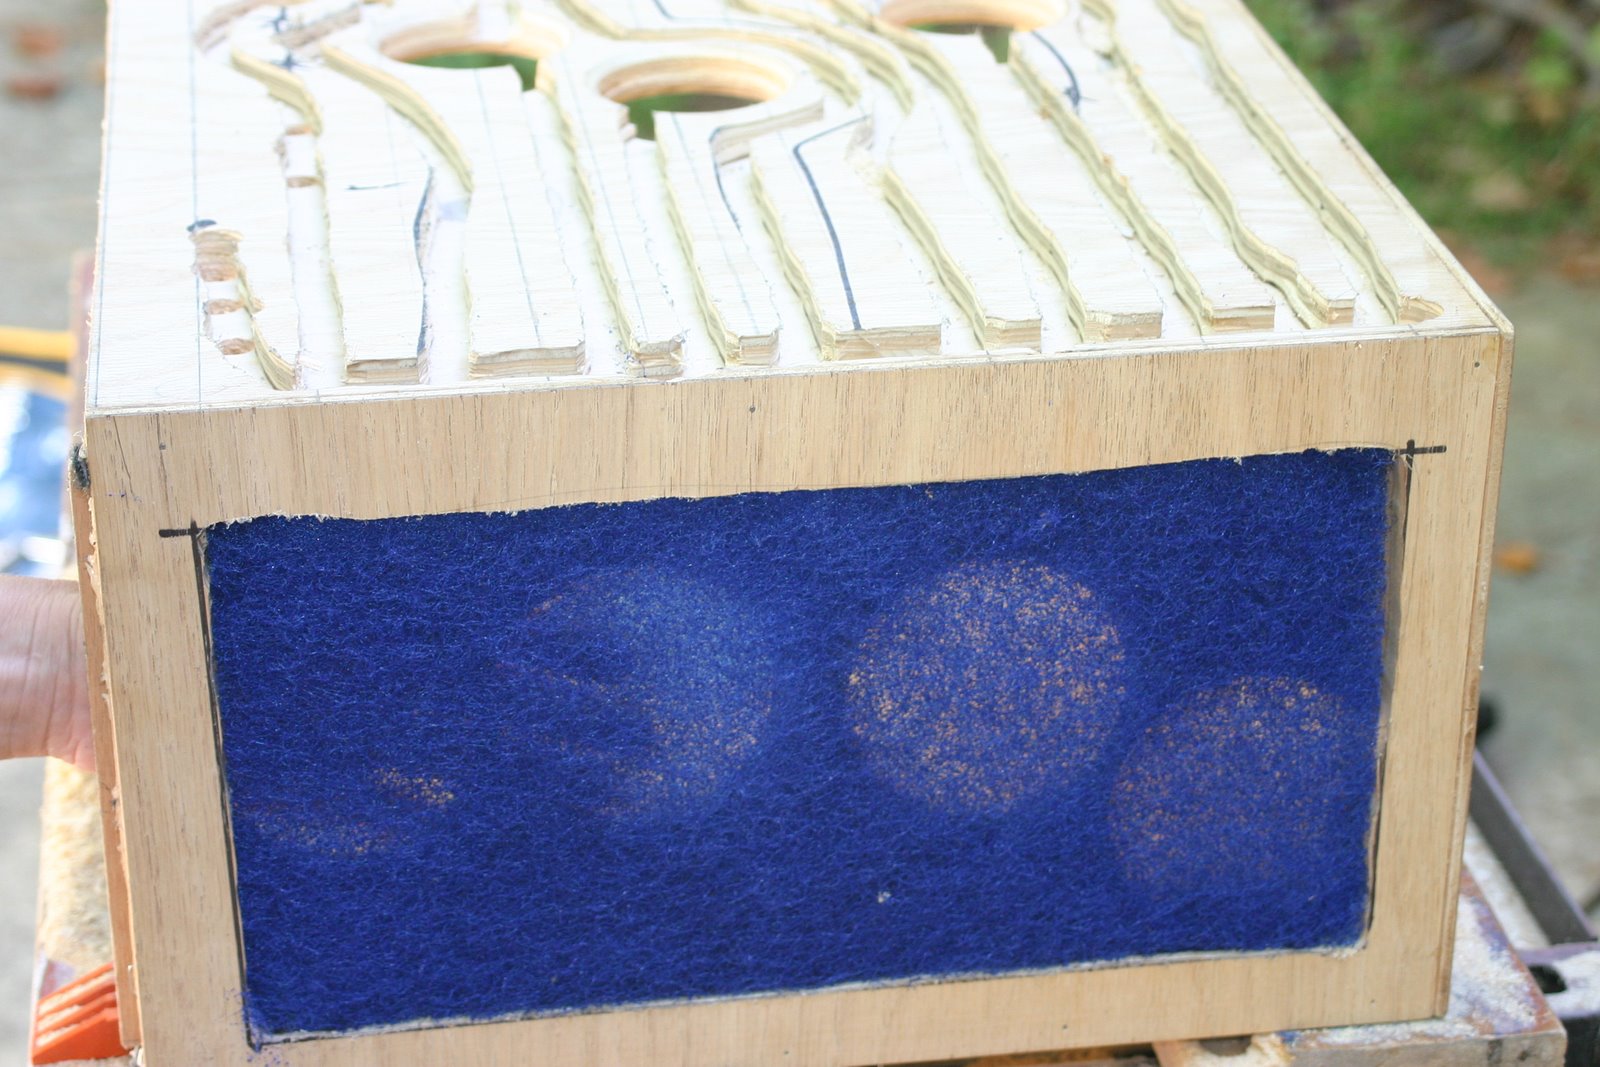
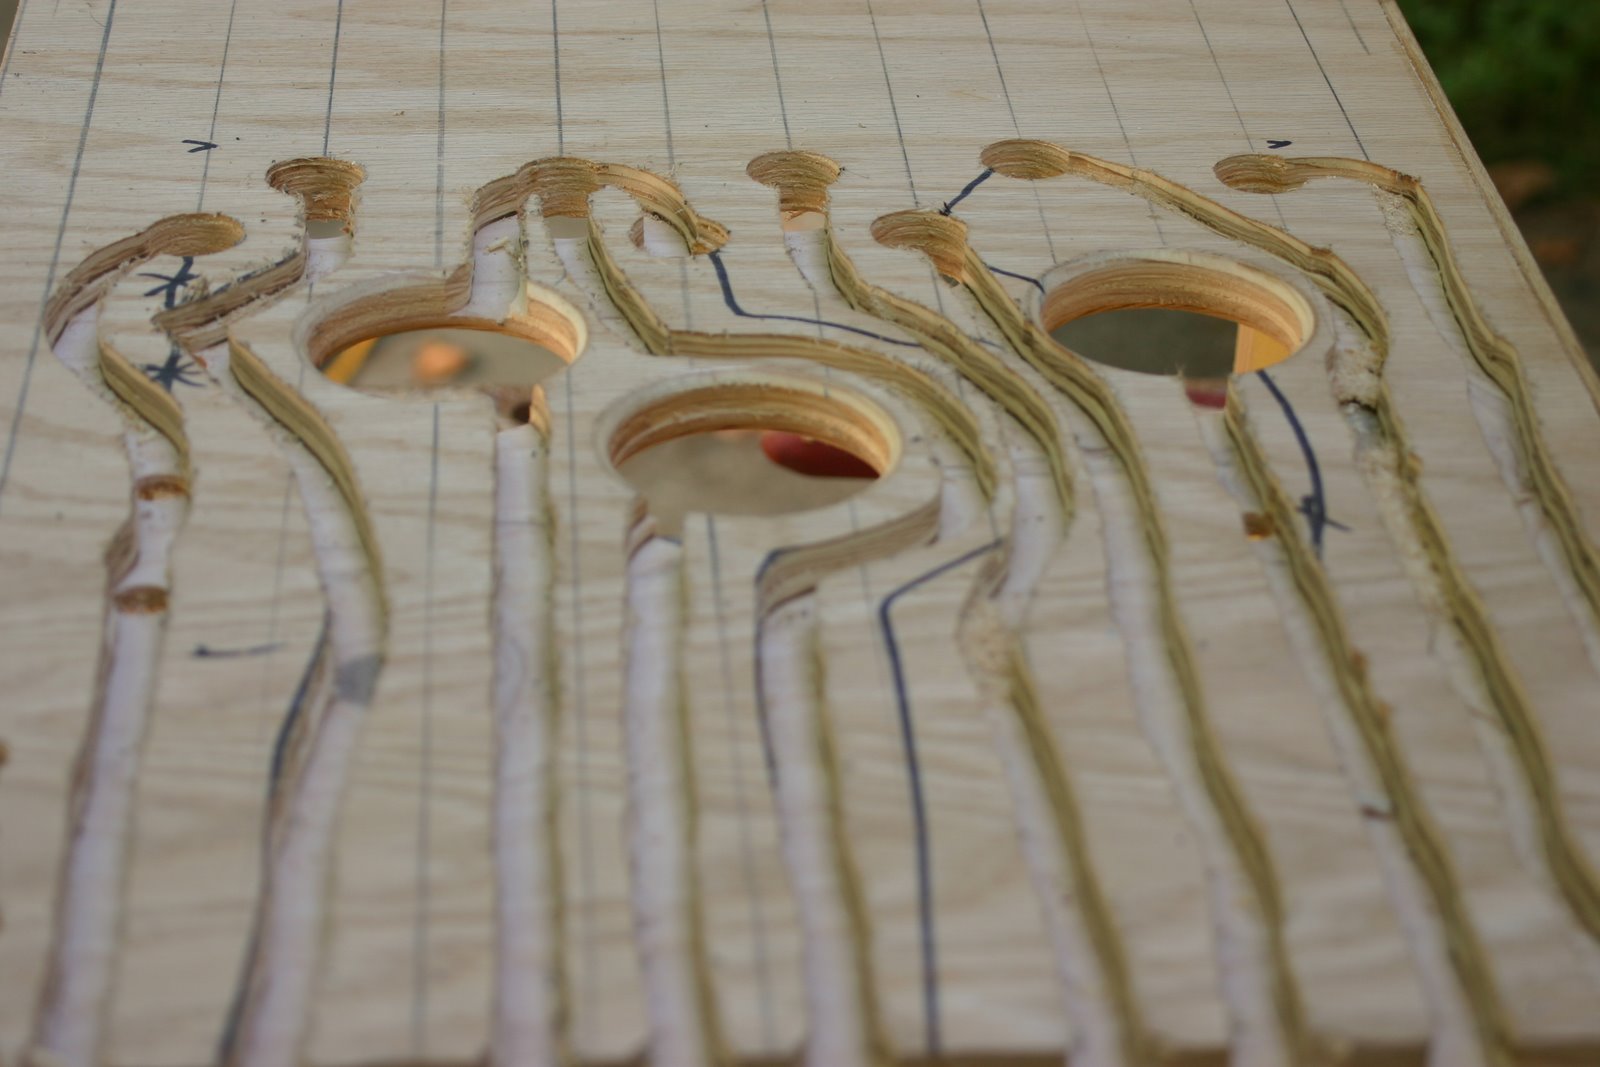
My hushbox has the wires for the projector in the same piping as where ventilation would go, so I needed a way to peel the wire off. Voila! Let the wires go up, and let the ventilation go out the side.

The next issue was how to turn it on. I didn't want it on all the time, so it needed turn on with 
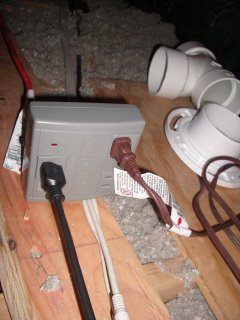
the projector. Again, I dipped in the knowledge well. Some good ideas such as building a relay off the serial port of the projecter got discussed, but BruceK of Home Theater Shack suggested a current switch. A current switch is typically used in your workshop to turn on a fan or light when you turn on a different piece of machinery. How about when my projector turns on.. the ventilation turns on? Perfect! Even better, even after my projector turns off, the fans continue to run internally- and so does my ventilation fan.


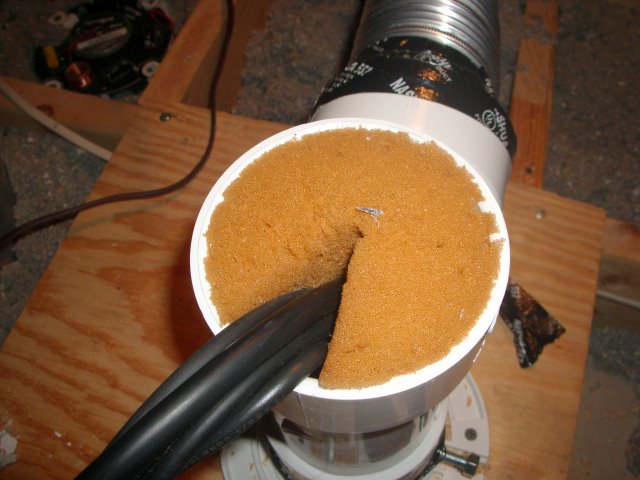
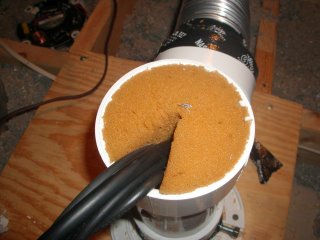
A couple of finishing ideas- I needed to seal the top of my support where the wiring ran- a car wash sponge was very nice.

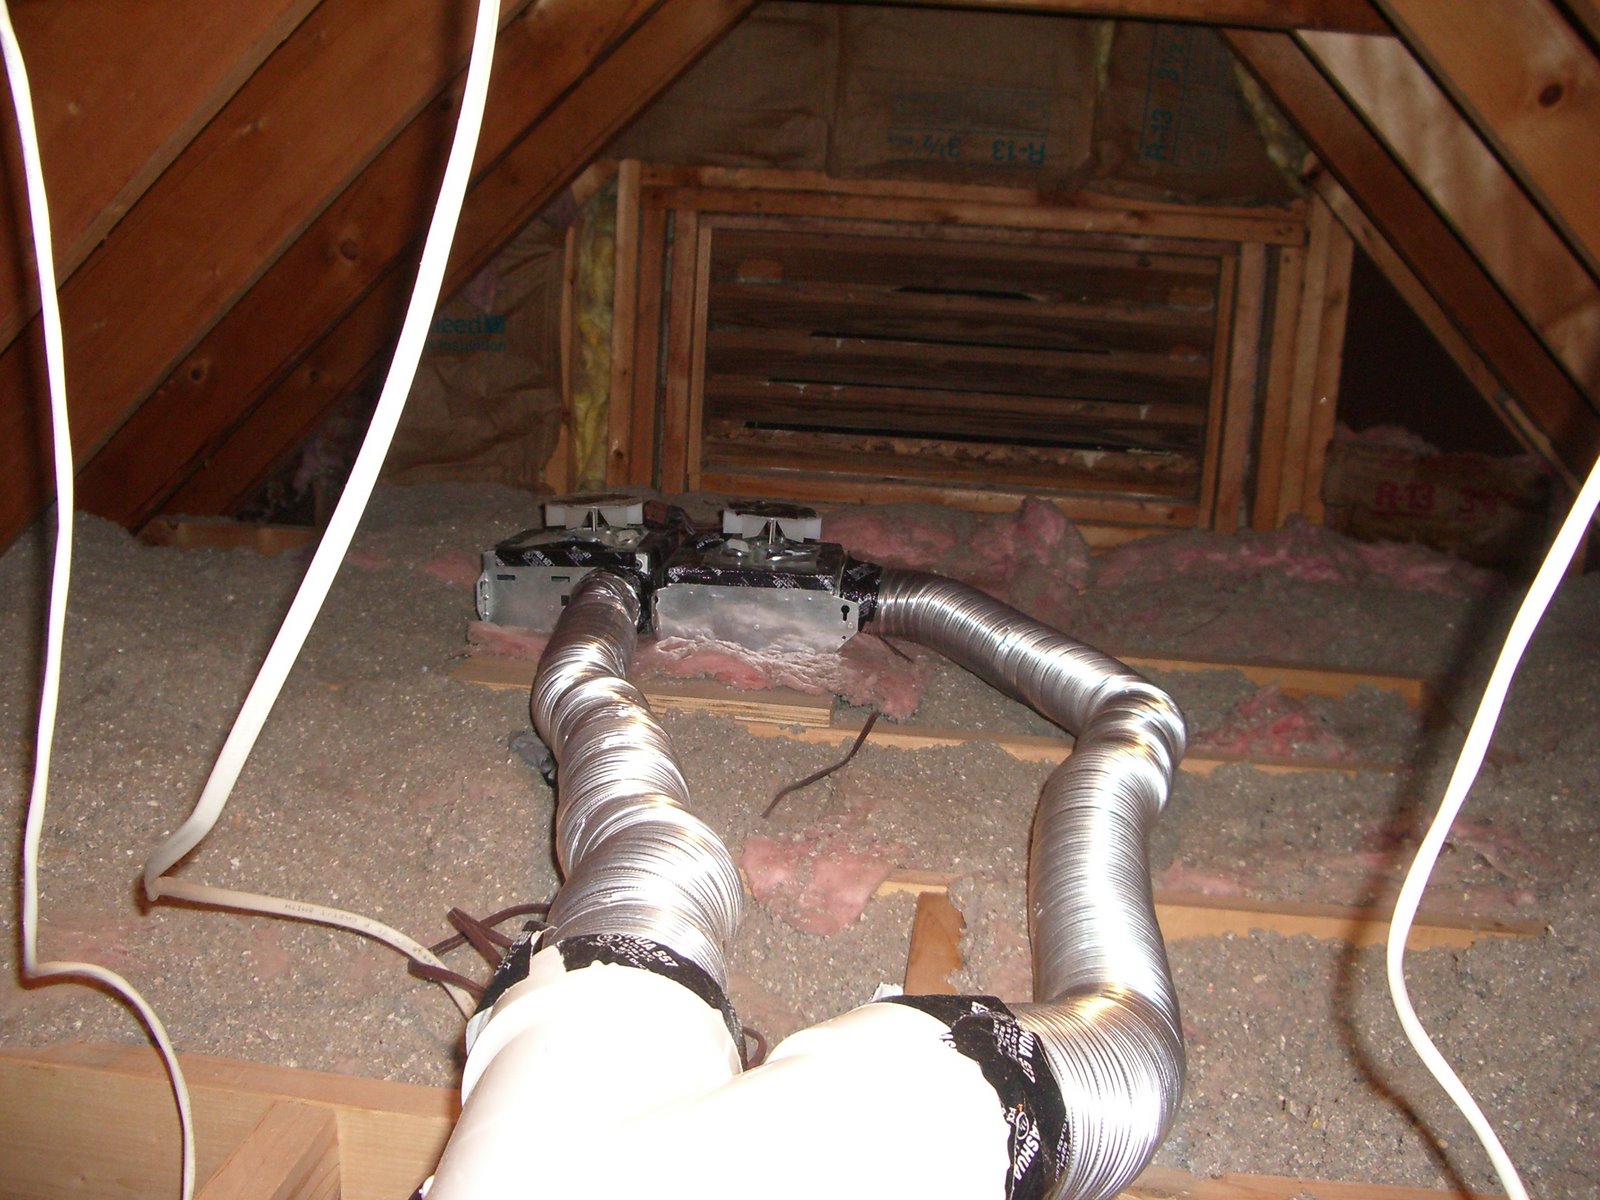
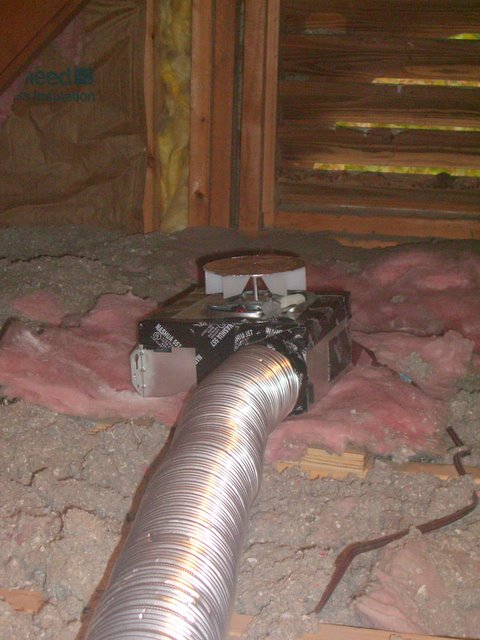
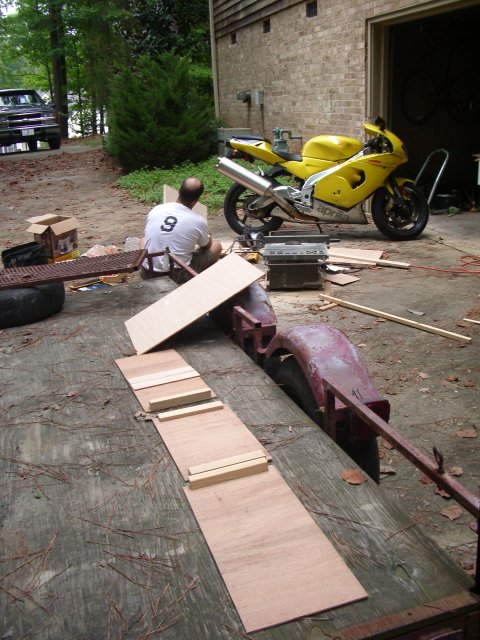
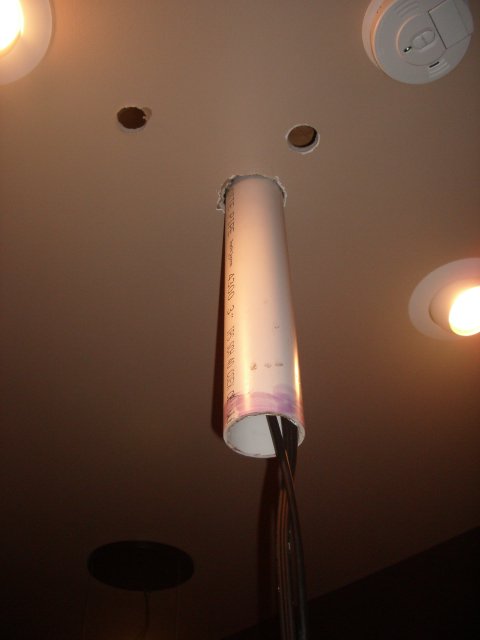
Finally, I used some 3" piping to locate the fan into a corner of the attic. This cut down on noise and vibration going into the room.

End result? Love it. The box runs cooler than the projector did sitting in open air- the internal fans never kick into high-draw mode. The overall assembly is much more quiet as well.

Labels:

Thursday, September 14, 2006

The Hushbox


I got some measurements of the projector, and then added in fudge factor for the expected thickness of insulation and room for wires. Andy sketched it up and we got to work.


The material list was:

  • 2x4 sheet of 3/4" oak plywood (top and bottom)
  • 2x4 sheet of oak panelling (sides)
  • Some 3" PVC
  • Two water closet flange mounts
  • Various hardware bits and supplies
Tools used:
  • Router- to give that finished look to the edges- and cut a groove for the front glass. It was also used to free-hand the circle on the top of the box.
  • Table saw- cut all the large pieces.. actually all the pieces- there really weren't that many
  • Glass cutter
  • Hole saw bits
  • Drill- for cutting the smaller holes, and driving the screws


We cut the boards to our dimensions, and then added internal bracing. The vertical supports were glued and screwed, but much of the vertical support came from the sides being attached to top and bottom.

One flange was mounted on top of the box, and the other on a board in the ceiling. The tube could pass through the flange on the top side so that the depth could be set later.

The flange mounted on the box was glued to the pipe. The box could be aimed by loosening the flange bolts and rotating the box, and the height set by the upper flange. This design allowed the entire assembly to be removed, or the box could be unbolted from the flange.

One side of the box is attached by velco- the entire panel removes, giving access to the cables, and is how the projector would be removed.

I got a piece of glass from Lowe's, and a glass cutter. That thing is cool- Andy had done it before, so he cut the glass to our dimension.

Next step will be to insulate the interior of the box.

Actually- after having tested it, we need to get some kind of forced ventilation. The idea was that we had several holes drilled under the air intakes for the projector. The 3" tube would be the hot air chimney, the support for the box and the conduit for the wire. Convection wasn't good enough and the box really heated up when it was buttoned up. One thing is that the optics had the proper vent, but the motor for the electics did not have a vent, so I think it is also a case of not enough intake. Brian is helping with some ideas for that- I'm leaning towards a bathroom fan at the top of the chimney, which would put it outside the room and keep it quiet.

Here's another design for a ceiling-mounted box.

Labels:

Tuesday, September 12, 2006

Projector mount in the toilet?

Eh? Well, in a way. I've given up on the motorized mount because it would be a whole lotta trouble for just moving it twenty inches. If I were to really do it right, it would disappear into the ceiling. Since I don't feel like cutting the rafters to have the box go up, it will remain fixed. So, I'm tossing it...

So, how to fix it? Right now, the projector is mounted to a metal place and is suspended on a piece of iron pipe. This works, but there are lots of cables hanging down. The projector can make a bit of noise- so I want to build a 'hush box'. This would be a wooden box with a glass front and some speaker-type sound absorbing material. But, it'll need to be vented, as the projector blows a lot of air around (hence, the noise).

I've been consulting with Andy, and our plan is to build a wooden box with oak plyboard (3/4") top and bottom, with thin oak paneling on the sides. One side would be made to be removable (same side as the cables plug into the projector). Also, there would be a vent cut into the bottom for an air intake- and an exhaust on the top.

To be especially clever, we're going to combine these elements- the support rod, the exhaust and the cable run.

I've got a 'water closet' flange- these things have a grooved portion that can be used to lock a device against it. We looked and looked for the other 'device' so that one end could be mounted to the box, and the other could be on our tube. Well, it turns out that the device that mounts to the flange is a toilet. Yes, there are quick-release grooves for toilets- and they don't exist off of toilets.

Oh well, what we ended up doing is using bolts to attach the flange to the hushbox, and the same thing on the other side. We also glued the tube into the flange on the box, and put a cotter pin on the ceiling side so the tube could be lowered out of the ceiling. Photos to come.

Labels:

Tuesday, August 01, 2006

A forked projector mount


I'm thinking of building a hushbox for my projector- a hushbox is a box which helps isolate the noise of the projector from the room. I'll build it out of hardwood paneling and line it with some kind of sound absoroption- and have a filtered intake for the projector and perhaps redirect the output right into the attic.

For the cool factor, I want to motorize it.

Right now, I'm thinking of having a board on which to build my hushbox. The board will be suspended from the ceiling by 4 rods, sliding into a bushing mounted in the ceiling (like upside down motorcycle forks). In each rod, I'd attach some wire or webbing, which went up through the tube out the top, above the ceiling and attach to a shaft. I have an old garage door opener motor which I was considering using to drive the shaft.

Labels: