The Hushbox

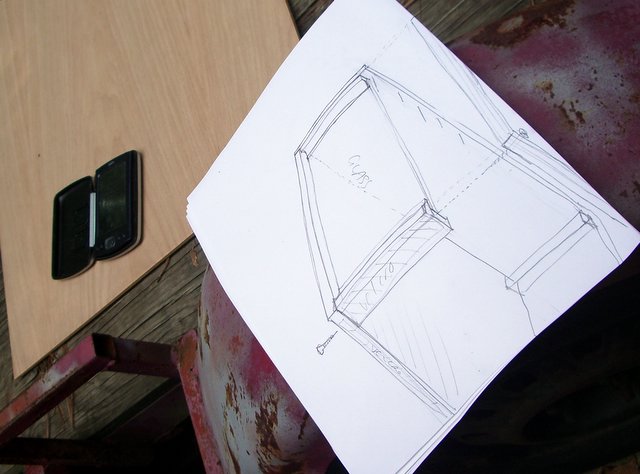
I got some measurements of the projector, and then added in fudge factor for the expected thickness of insulation and room for wires. Andy sketched it up and we got to work.
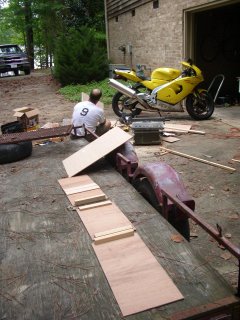
The material list was:
- 2x4 sheet of 3/4" oak plywood (top and bottom)
- 2x4 sheet of oak panelling (sides)
- Some 3" PVC
- Two water closet flange mounts
- Various hardware bits and supplies
- Router- to give that finished look to the edges- and cut a groove for the front glass. It was also used to free-hand the circle on the top of the box.
- Table saw- cut all the large pieces.. actually all the pieces- there really weren't that many
- Glass cutter
- Hole saw bits
- Drill- for cutting the smaller holes, and driving the screws


One flange was mounted on top of the box, and the other on a board in the ceiling. The tube could pass through the flange on the top side so that the depth could be set later.
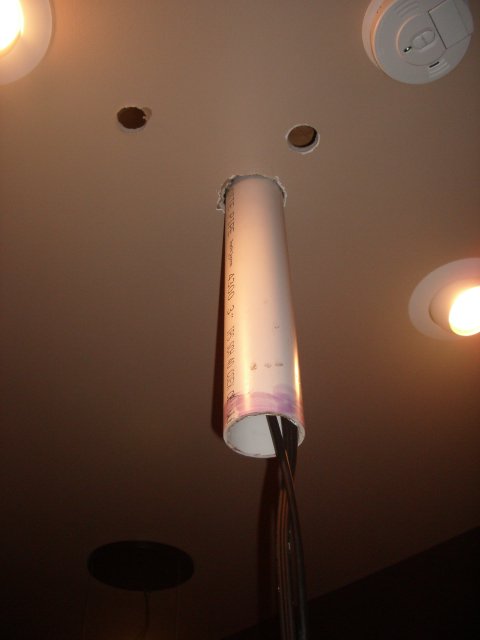
The flange mounted on the box was glued to the pipe. The box could be aimed by loosening the flange bolts and rotating the box, and the height set by the upper flange. This design allowed the entire assembly to be removed, or the box could be unbolted from the flange.
One side of the box is attached by velco- the entire panel removes, giving access to the cables, and is how the projector would be removed.
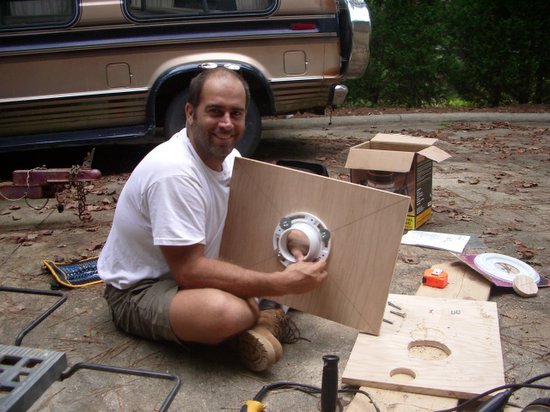
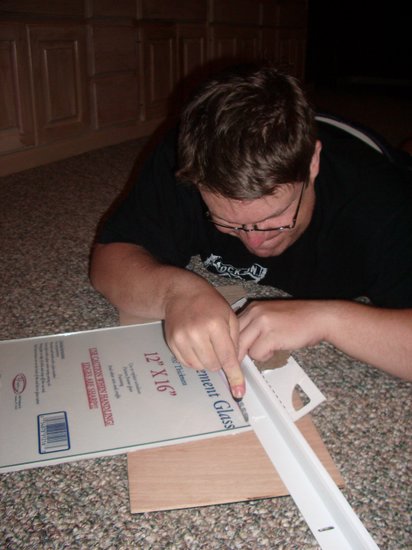
I got a piece of glass from Lowe's, and a glass cutter. That thing is cool- Andy had done it before, so he cut the glass to our dimension.
Next step will be to insulate the interior of the box.
Actually- after having tested it, we need to get some kind of forced ventilation. The idea was that we had several holes drilled under the air intakes for the projector. The 3" tube would be the hot air chimney, the support for the box and the conduit for the wire. Convection wasn't good enough and the box really heated up when it was buttoned up. One thing is that the optics had the proper vent, but the motor for the electics did not have a vent, so I think it is also a case of not enough intake. Brian is helping with some ideas for that- I'm leaning towards a bathroom fan at the top of the chimney, which would put it outside the room and keep it quiet.
Here's another design for a ceiling-mounted box.
Labels: Hush Box
posted by Farzanegan @ 5:17 PM
0 comments
links to this post
![]()
